In this walkthrough, you'll learn how to insert a discussion forum through Disqus on your Webnode site. To add the discussion via Disqus, you need to add HTML code, this function is available from Limited premium package (this applies to projects created after 26/06/2023).
Disqus is a commenting service for websites or online communities. The platform includes various features such as anti-spam tools, comment statistics, moderation options, email notifications and mobile comments. For example, you can use it to have discussions under articles, images, or as a space for feedback from site visitors.
Disqus has both free and premium service options.
1. The first step is to register on the Disqus website. Click Get Started here.

2. Register via email, social networks or sign in if you already have an account.

3. Next, choose I want to install Disqus on my site.

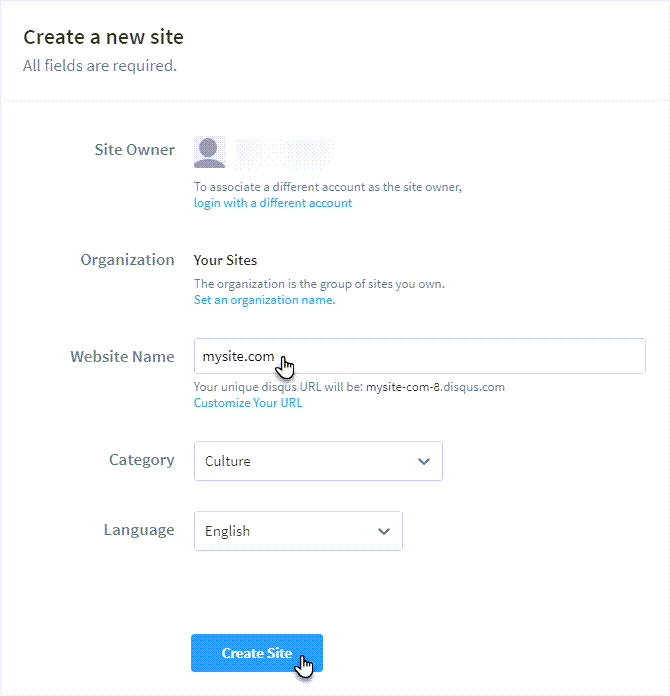
4. Enter a domain name, select a page and language theme, and confirm with the Create Site button.
5. Choose one of the paid packages or choose the free version.

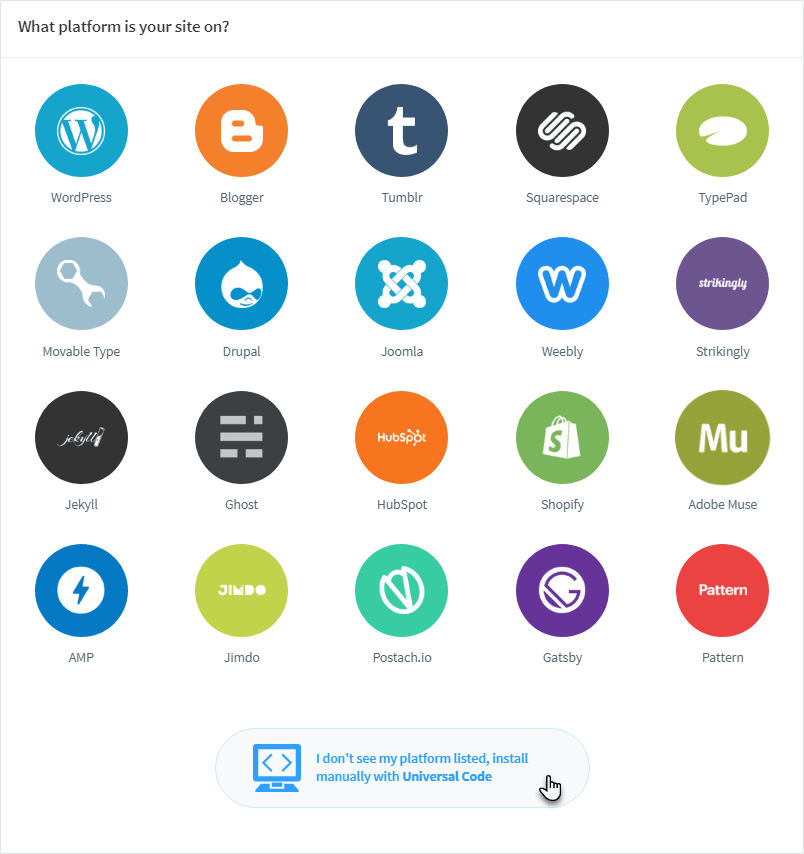
6. Choose I don't see my platform listed, install manually with Universal Code.
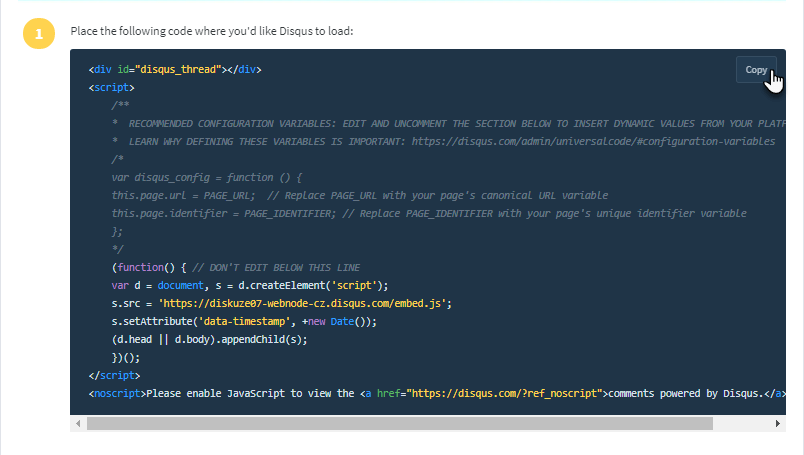
7. Scroll down to the page and copy the code.
8. Now go to the Webnode editor, select where you want to insert the discussion forum and add HTML content.

9. Paste the copied code and confirm with the OK button.

Publish the site.
10. By default, the discussion will now appear on the published version of the website.

TIP: Complete information about Disqus and all features can be found directly in their help here.