This article describes how to add the Facebook chat to your website. To add the Facebook chat, you need to add HTML code, this function is available from Limited premium package.
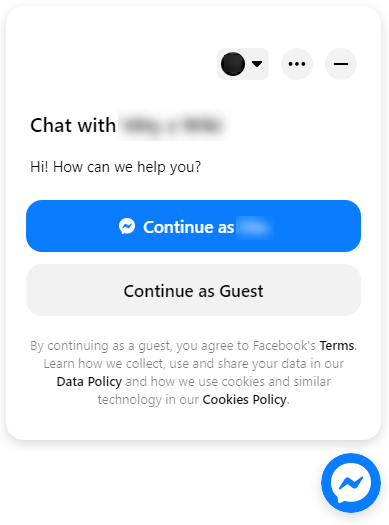
Embed the Facebook Messenger chat window on your website and answer your customers' questions online.
Summary of the article
Terms of service and other information
How to generate a code and add it to your website
TIPS: Did you enter the code according to the instructions, but the chat box does not appear on the published pages?
Terms of service and other information
You will need to have your own domain on the page where you wish to place the chat box in order to use the service.
The domain must have a security https certificate deployed. Domains that point to pages created with Webnode usually have it deployed automatically. If you use your own domain pointing to our site, whether it is under our administration or with another registrar, contact us.
To generate the code in your Facebook account, you need to possess administrative authority over the website. Otherwise, you will not be able to access these features in your account.
Facebook Messenger is an external service, so we cannot help you directly generate the code in your Facebook account. For the same reason, we are not responsible for the operation of this add-on.
How to generate a code and add it to your website
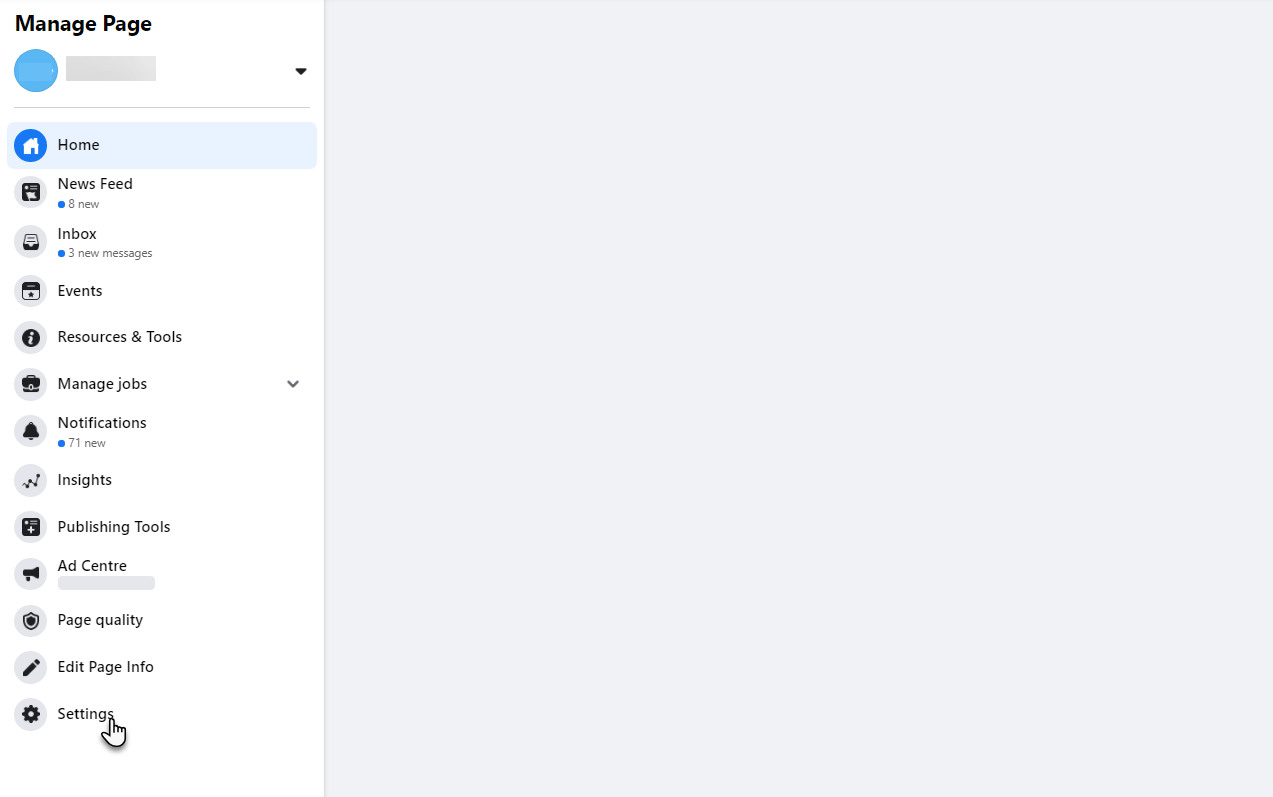
1. In your account, select the Page settings tab.
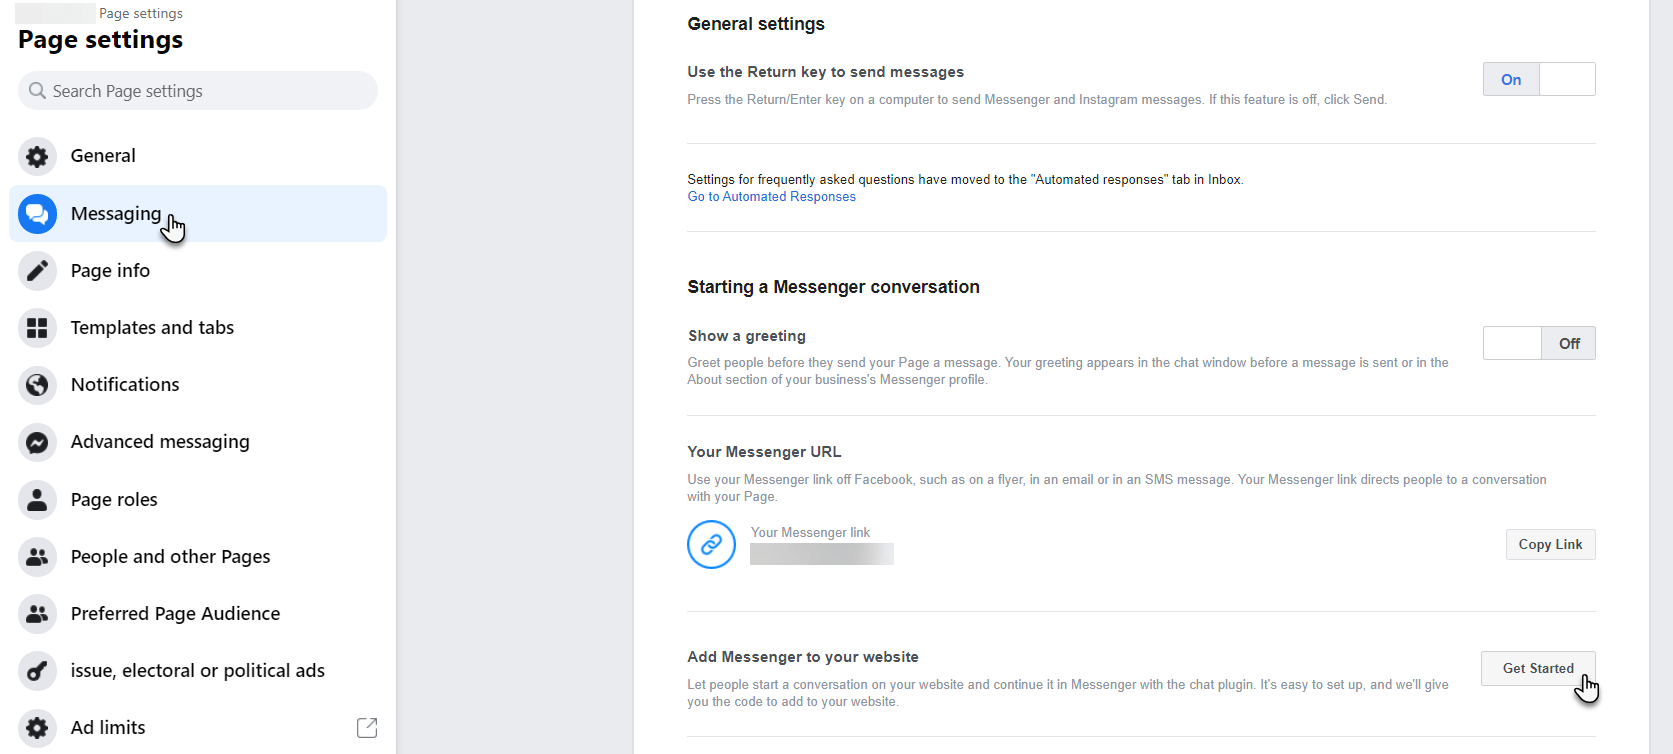
2. Go to Messaging, scroll down to the General Settings section and select Get Started.
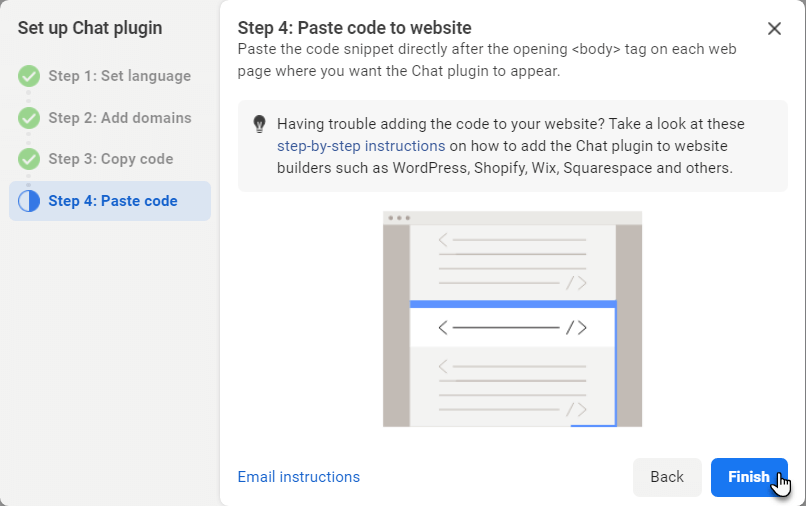
3. Here select Set up.
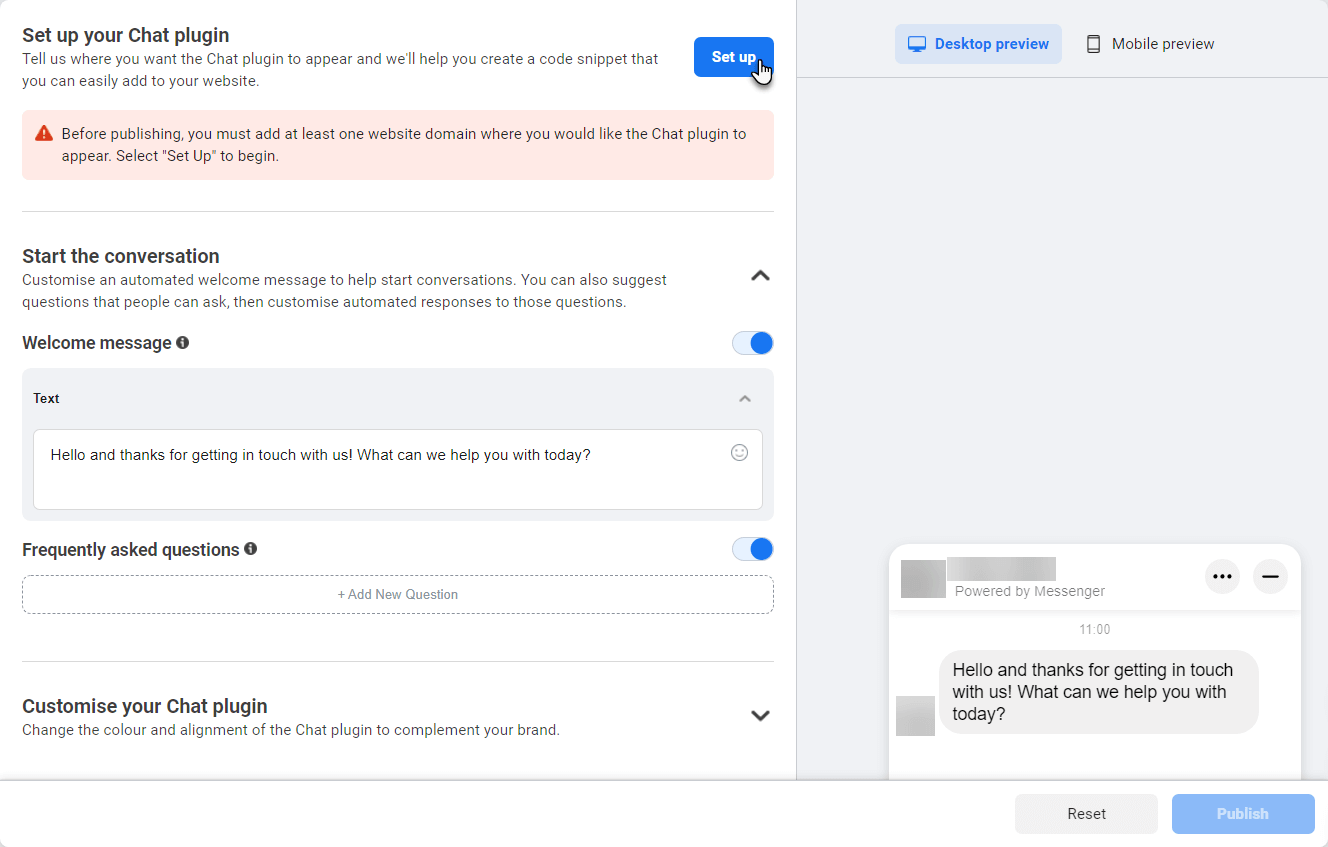
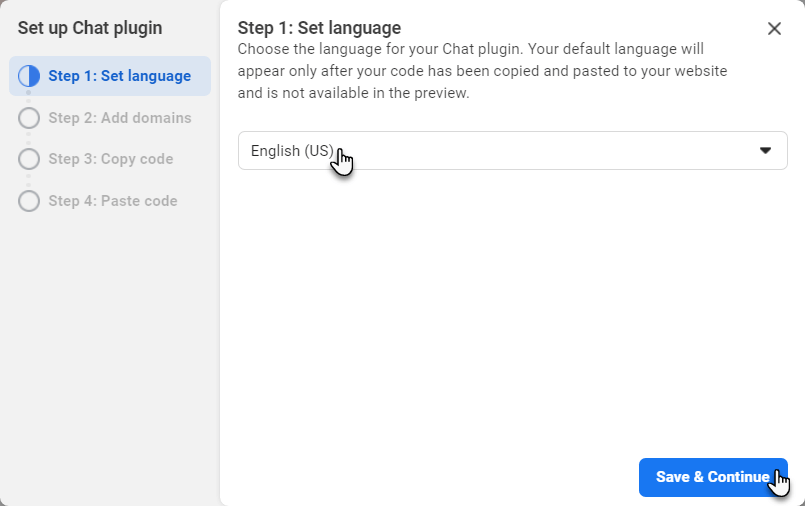
A. New window will open, you can generate a code there in three steps via the Save & Continue button. In first window choose the language.
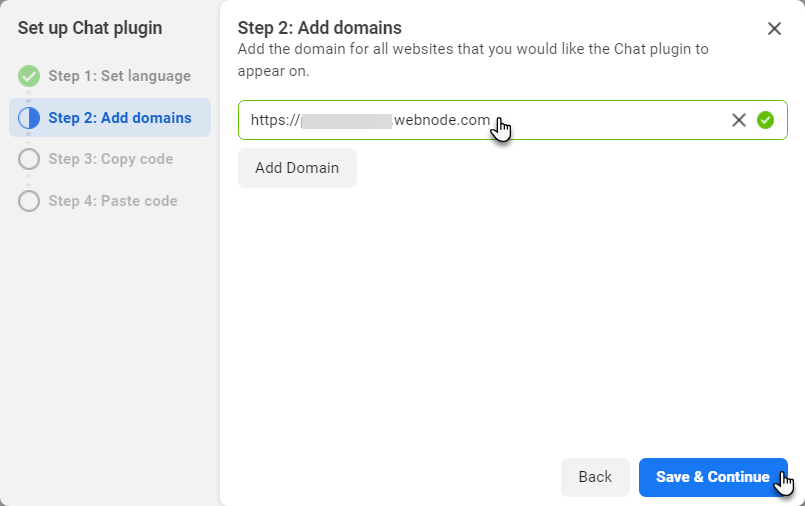
B. In second add your domain (or domains).
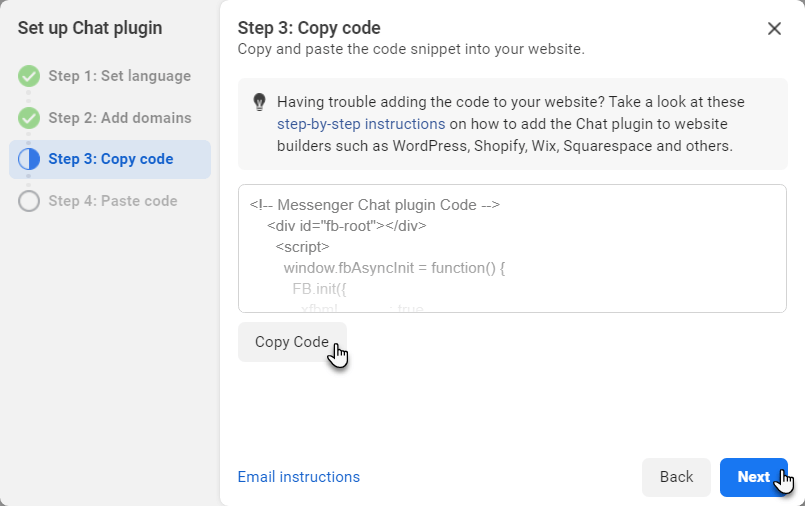
C. In the last step, the code is already generated. Copy it by the Copy code button.
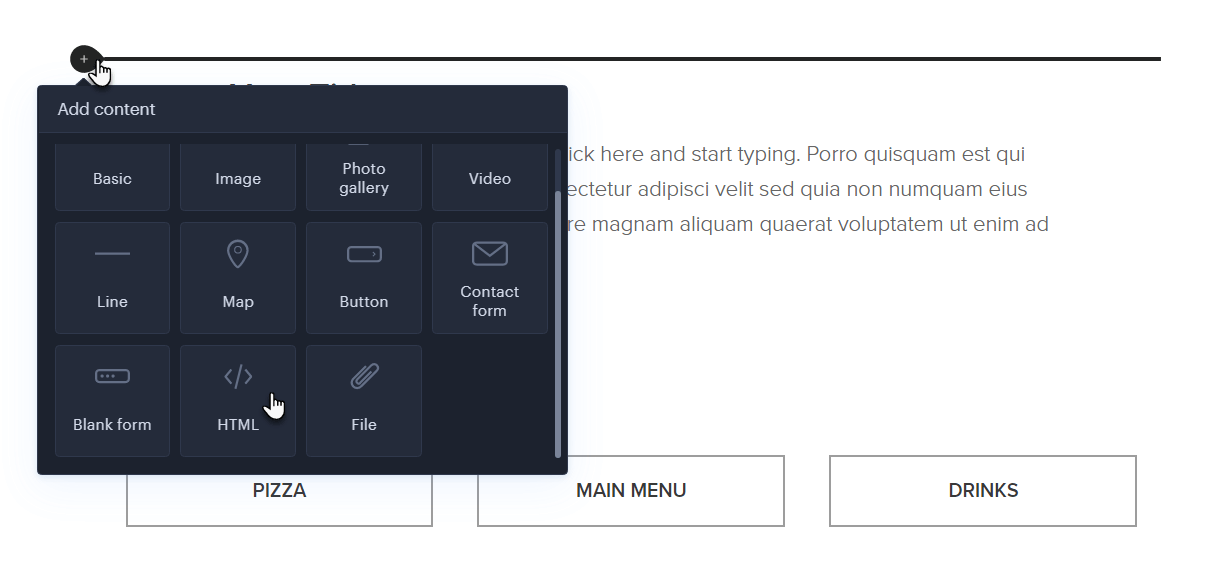
D. Now you can insert the code into pages. The code must be added to each page where you want the chat box to appear. Add it as high as possible to the page, ideally just below the introductory image of the page. Insert it via the Add Content button and the HTML Code feature. Publish pages after pasting the code.
E. Go back to the Facebook settings and click Finish.
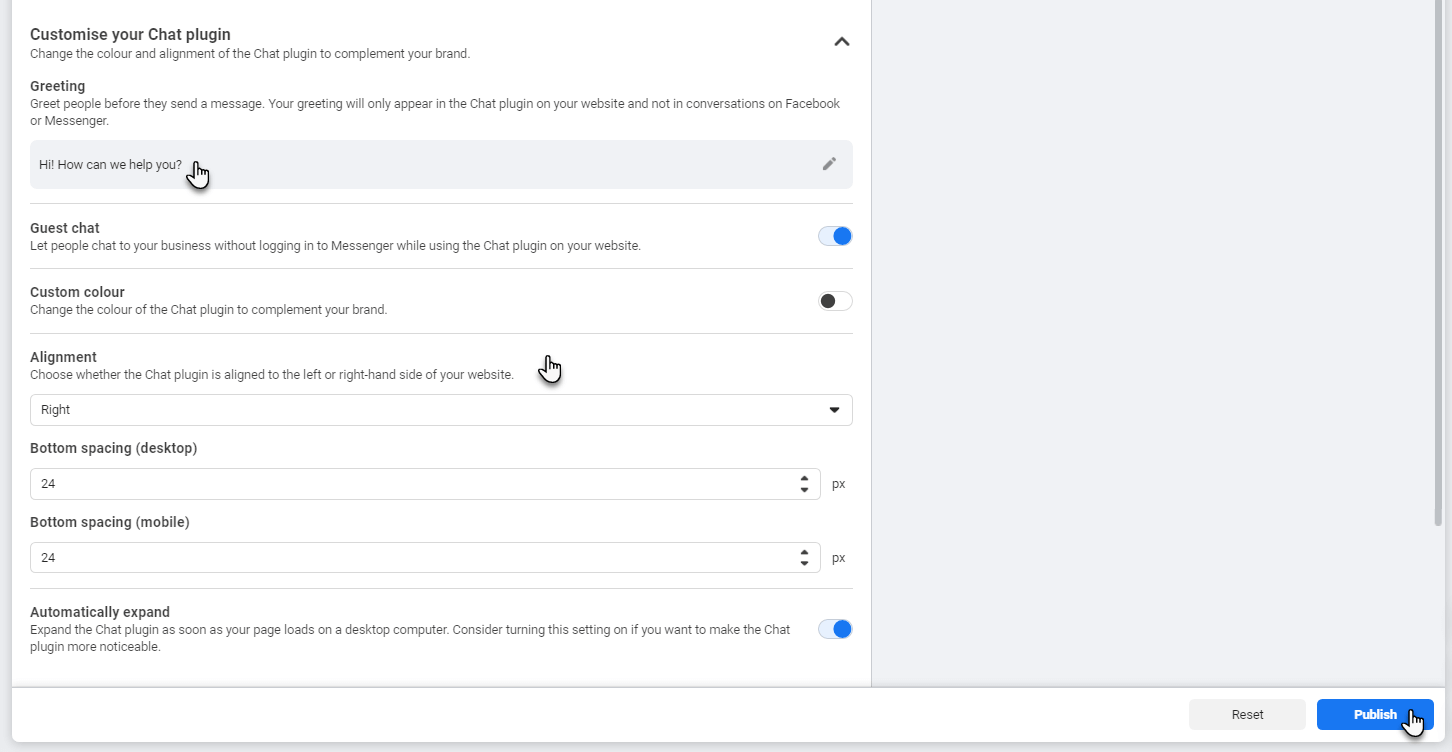
4. Now you can customize the chat window (greeting, colour, size etc.) and save it by the Publish button.
TIPS: Did you enter the code according to the instructions, but the chat box does not appear on the published pages?
- Make sure that you meet the basic conditions for using the service back to the beginning of the article (your own domain with an active https certificate).
- Check in the last point of code generation that you have a domain added to the list of domains for using the service (see point 3.B)
- Verify that you have copied the entire code that you received. We recommend using the option to send the code to an email message and copy it from it (see point 3.C).
- Make sure that the code is correctly pasted on the page where you want the chat box to appear. The code should be inserted as high as possible on the page, and the pages should be published once inserted.