This article is about the original Webnode editor. If your site was created in the new editor, you can go to our knowledgebase for new editor.
There are two ways to insert a banner into your website for linking to a sponsor, a friend, or just to your favorite website. The first way is to get the html code of a banner and paste it into your page. The second option is to create your own banner. The following instructions describe how to get the html code for banners or how you can create your own banner.
What is a Banner?
A banner is a type of advertising used on websites. They are usually a picture or animation that leads to another website.

Banner HTML code
Some websites have banner html code available to copy on a special page. This is usually found on pages like "Promote us", "Add us to favorites", "Icons and banners for your page", "For Webmasters" etc.
If the banner has its html code, proceed as follows:
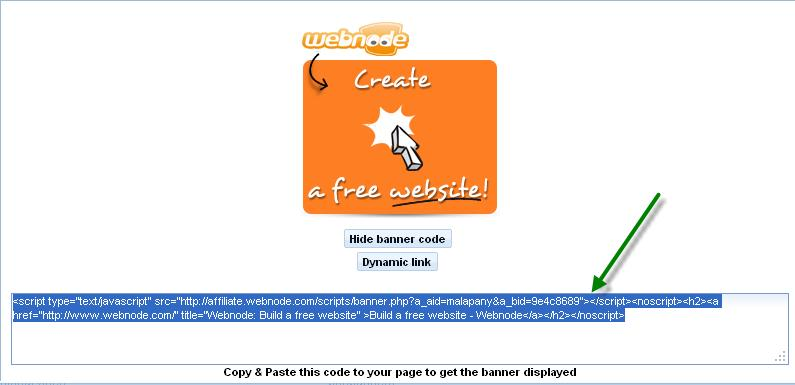
1. Copy the banner html code (eg by pressing Ctrl + C) ...
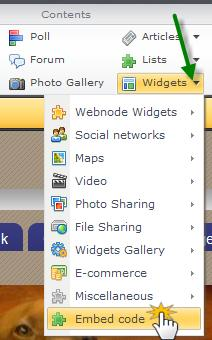
2. ... Log into Webnode and go to your website editor. At the top of the toolbar click on "Widgets" and select the last option "Embed code” from the drop-down menu.
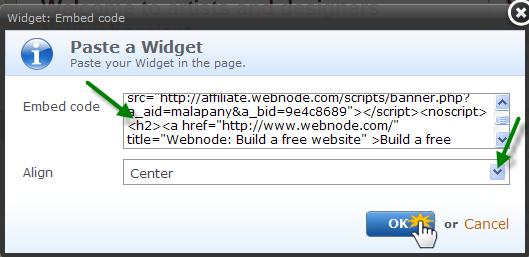
3. The "Paste a widget" window will now open. In the "Embed code” field insert the copied code from the clipboard (eg with Ctrl + V). You can use the "Align" option to set whether you want the banner to be centered, left, or right. Confirm your changes by clicking "OK".
4. Do not forget to publish the changes for your site visitors.

Create your own banner
If the banner you want does not have the html code available you can create it yourself by simply inserting an image with a link:
1) You can create or get an image that will serve as your banner. As an example we will work with this Webnode image:

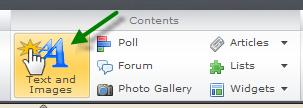
2. Log into Webnode and go to your site editor. Click on the "Text and Images" button to insert a block of text.
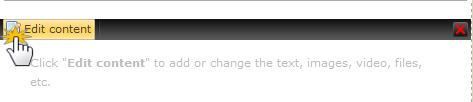
3. To edit the text block click on the "Edit Content" button of the block.
4. Following the same steps described in the "Working with Images" article, insert your chosen image -your banner- into the text block.
5. Now add a link to the inserted image using the steps described in the "Insert and edit link" article.
6. Once you have created your banner, be sure to publish the page for the changes to take effect for the visitors to your site.
